
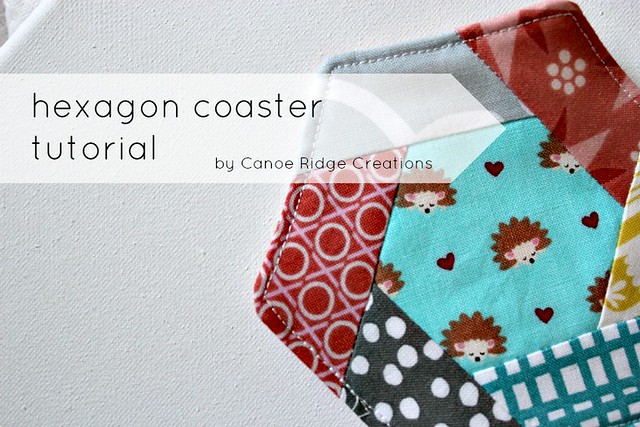
Today I have a fun & fast tutorial to share with you all -- the Hexagon Coaster Tutorial. This DIY project is beginner friendly and a great scrap buster too. Let's get started!
Fabric Requirements:
- scraps!
- 6" x 6" batting
- 6" x 6" backing fabric
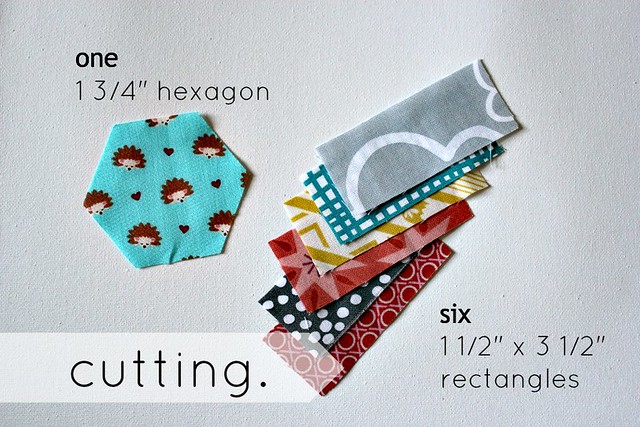
cutting:
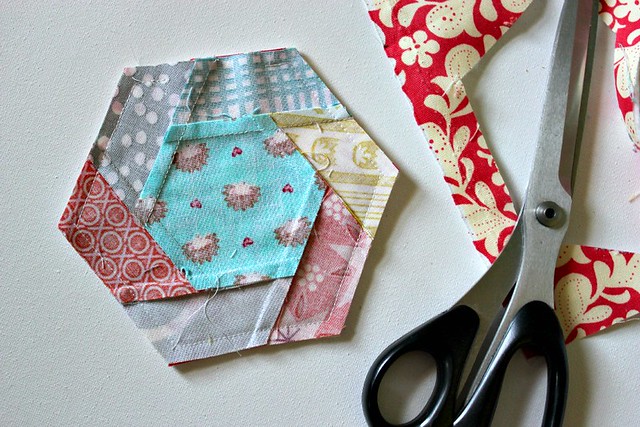
- one 1 3/4" hexagon (remember -- hexagon size refers to the measurement along 1 side, not the measurement through the center of the hexagon)
- six 1 1/2" x 3 1/2" rectangles
sewing:
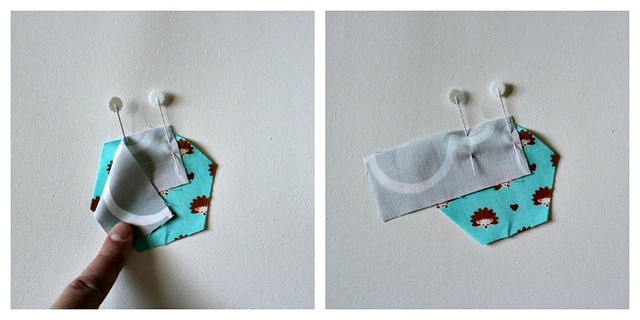
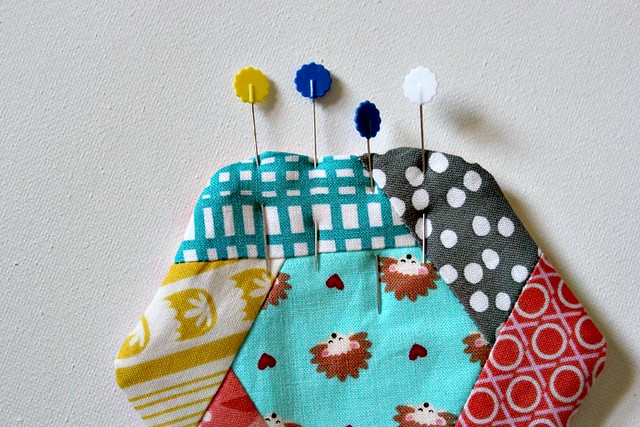
1. place one 1 1/2" x 3 1/2" rectangle on top of the 1 3/4" hexagon, right sides together (RST). pin as pictured above, leaving 1/2" (on the left side) unpinned.

2. using a 1/4" seam allowance stitch between the pins. make sure to backstitch at the beginning and at the end.
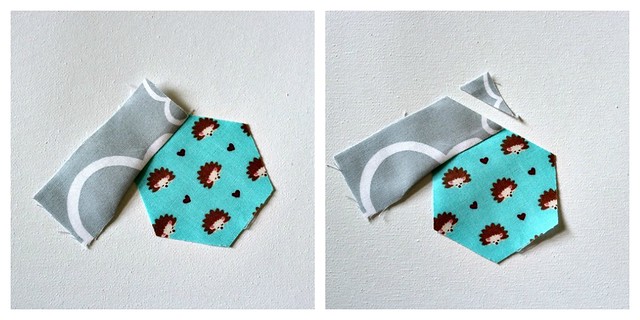
3. press the seam to the outside. using the hexagon as a guide, trim the excess strip end -- see picture.
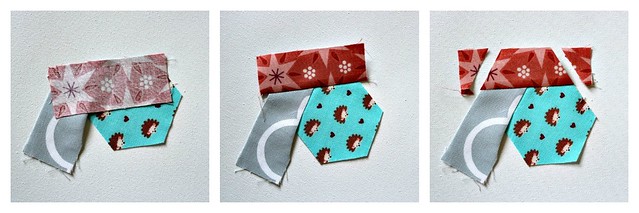
4. working clockwise, place the next 1 1/2" x 3 1/2" rectangle on top of the hexagon unit, RST. stitch using a 1/4" seam allowance and press seam toward the outside. trim the excess strip ends off.
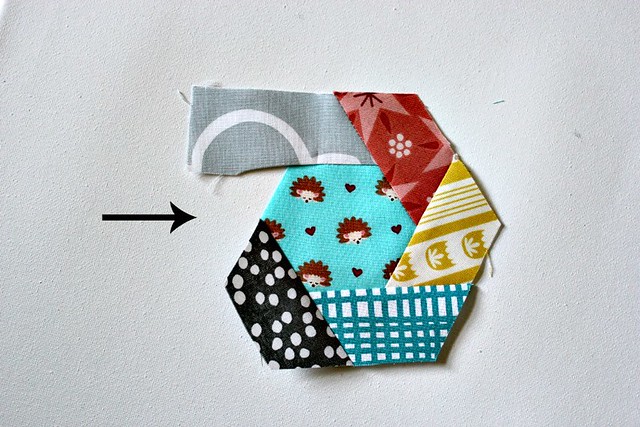
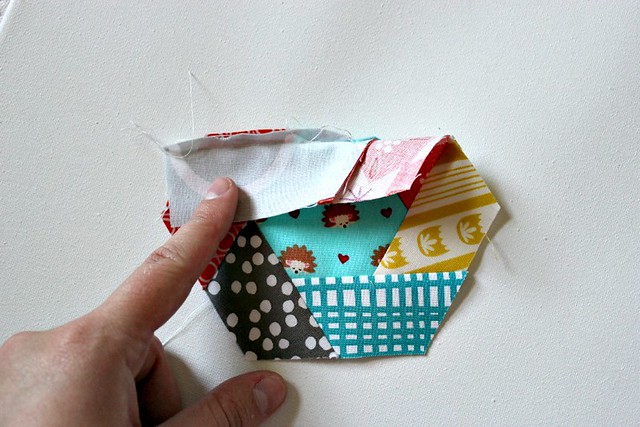
5. continue your way around the hexagon unit until you have one edge remaining.
6. place the last 1 1/2" x 3 1/3" rectangle on the remaining side, RST. making sure to fold the starting rectangle out of the way. stitch using a 1/4" seam allowance.
7. press seam outward and trim excess ends.
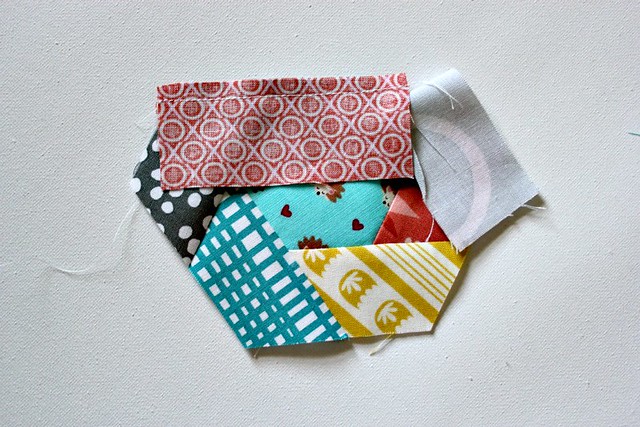
8. lay the un-sewn portion rectangle on top of the hexagon unit, RST. stitch using a 1/4", sewing the remainder of the strip.
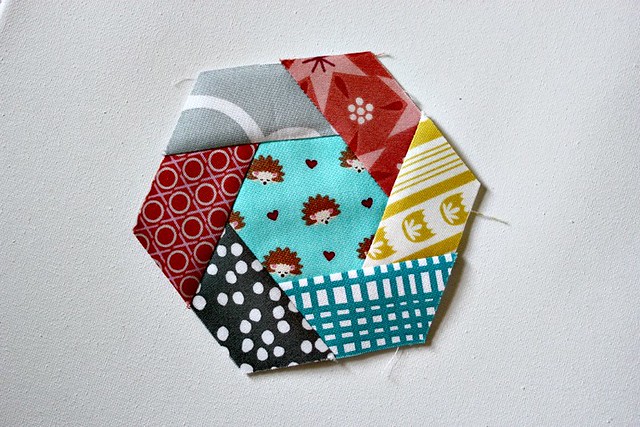
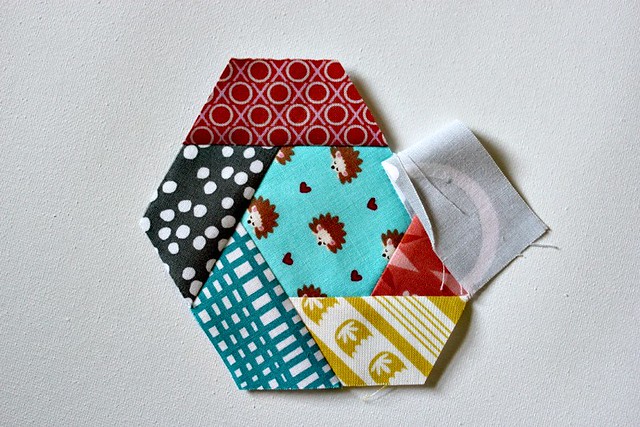
9. press seam outward and trim the excess strip end.
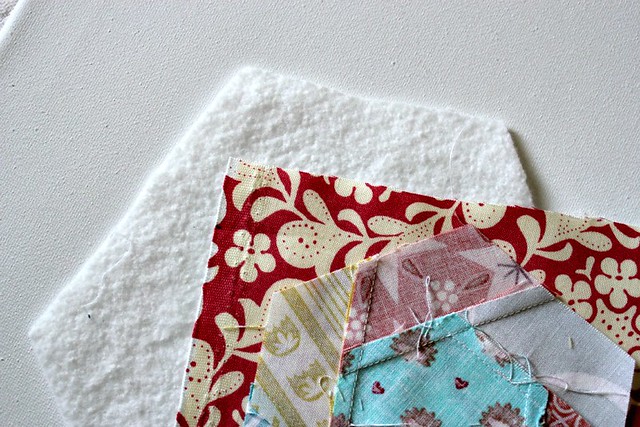
10. layer the 6" x 6" square of batting on top of the 6" x 6" backing fabric, on top of the hexagon unit, RST.
11. using a 1/4" seam allowance, stitch around 5 sides of the hexagon unit. be sure to backstitch at the beginning and at the end of the seam. leaving the 6th side of the hexagon unit un-sewn (open).
12. trim excess batting and backing fabric.
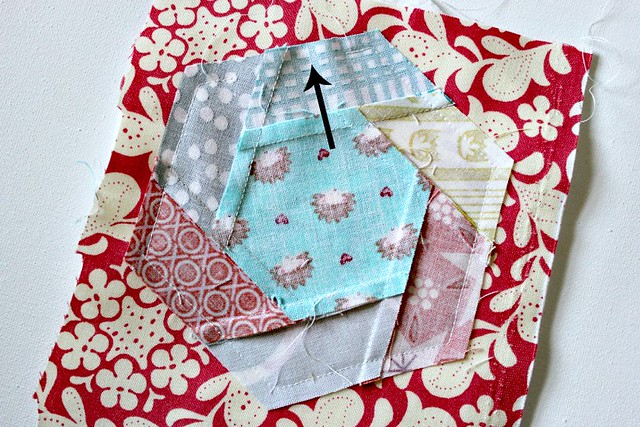
13. turn right side out, press, and pin the open edge.
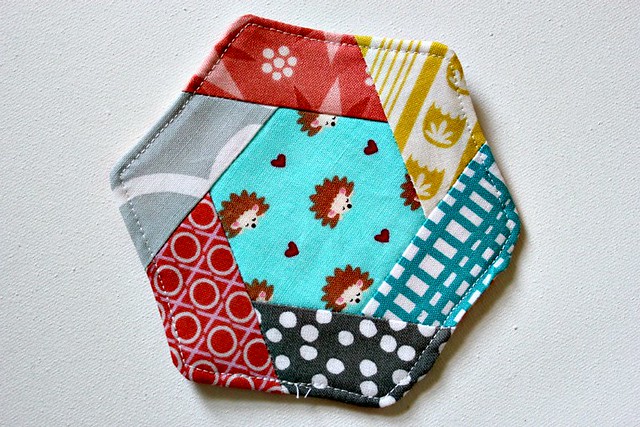
14. top stitch 1/8" around the entire coaster.
and done! if you use this tutorial, i'd love to see your coasters -- please share them in the CRC flickr group. be sure to also check out the other great projects + tutorials shared during the Festival of Hexagons blog hop!
Monday, Aug. 13
Ali from a²(w)
Tuesday, Aug. 14
Amanda from A Crafty Fox
Wednesday, Aug. 15
Kelly from Kelbysews
Thursday, Aug. 16
Terri from Sew Fantastic
Friday, Aug. 17
Jeni from In Color Order
Monday, Aug. 20
Lindsey from LRStitched
Tuesday, Aug. 21
Kati from From The Blue Chair
Wednesday, Aug. 22
Michelle from Super Orange Sewing (formerly I Like Orange, Too)
Thursday, Aug. 23
Sara from Sew Sweetness
Friday, Aug. 24
Megan from Canoe Ridge Creations <--- you are here! :)
Saturday, Aug. 25
Recap
Aug. 27 - Sept. 2
Link Party
Sept. 3 - Sept. 5
Voting
Friday, Sept. 7
Winners announced
have a wonderful weekend!
xo, megan.


This is a great tutorial Megan! Thanks for sharing. :)
ReplyDeleteCute xxx
ReplyDeleteVery cute, I always wondered how you did that with hexies!
ReplyDeleteLove the coasters. Thanks!
ReplyDeleteVery cute!
ReplyDeleteWhat a great tutorial and think these would make great gifts, thanks.
ReplyDeleteThey are so cute. I'll be bookmarking this page for later =D
ReplyDeleteThanks, Megan. Nice tute. Hexie coaster is really cute.
ReplyDeleteA super tutorial...I just have to give this a try! Thanks so much.
ReplyDeleteCuteness! I liked your tutorial so much, I pinned it!
ReplyDeleteDeborah
homemakerhoney @gmail .com
What a neat idea! Thanks for sharing.
ReplyDeleteThis tutorial is fantastic! I've just finished making (it took me over 7 years) a quilt with this exact block. It was ALL EPP though, right down to the half hexagons. http://buttontreelane.blogspot.com.au/2012/08/since-last-time-we-spoke.html
ReplyDeleteI love this coaster design so much I think I'm going to make some tonight, for a friend's birthday present!
Thank you!
I think your measurement for the center hex is incorrect. Is it supposed to be 2 3/4 inches? I tried the 1 3/4 and it was WAY too small. Did 2 1/2 and it still seemed a little small, compared to your finished top piece. LOVE the idea!!!
ReplyDeleteHi, Jane -- thanks for the comment! Hexagons (especially in English Paper Piecing) are sized according to the measurement along 1 side of the hexagon. So the 1 3/4" hexagon means the measurement along one side is 1 3/4", not the measurement through the center of the hexagon. Hope this helps! :)
DeleteObviously, I am not experienced with hexagons in quilting... Thanks for the info!
DeleteHi there!!! I love these coasters! I so want to be a quilter, but I am not soooo good about the whole measuring exactly! I am so bad about that, anyway I really love your blog and your coasters are wonderful!!!! Thanks for sharing!
ReplyDeleteTracey
Hi,
ReplyDeleteCan you please link up or let me know how to cut a hexagon shape? I've found tutorials for hex's based on the total size but none referencing the sides. Please help!
Muito obrigada por esta explicação...
ReplyDeleteMuito obrigada!!!!
abraços de Maria Filomena
Perhaps your guests might think that these Glass Photo Coasters, sometimes called picture frame coasters, are just like any other glass coasters, but wait till they get that surprise the moment they lift their glass from them and see your photo in it click here Photo Coaster
ReplyDeleteThis comment has been removed by the author.
ReplyDeleteI'm just beginning to quilt and this looks like something I could do easily, thank you for sharing.
ReplyDelete