This post may contain affiliate links. I may receive commissions for purchases made through links in this post.
Quilt binding is one of my all time favorite parts about making a quilt. There's something about those crisp, finished edges! Today I'm sharing a tutorial showing you how I make, attach, and finish the binding on my quilts. I prefer to use a double fold binding that is machine stitched onto the front and hand stitched to the back. Here we go...
a basic sewing machine foot (I use my 1/4" almost all of the time)
:: PREPPING YOUR BINDING ::
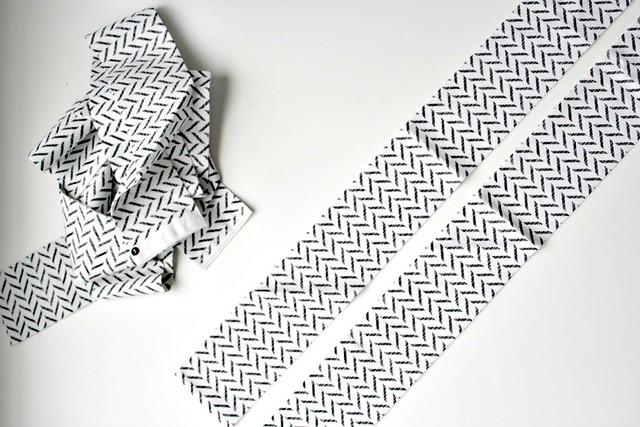
First start by calculating how many binding strips you will need. If you need a little help, Robert Kaufman has a great phone app called QuiltingCalc -- plus it's free! Once you've figured out how many strips you need, cut your binding fabric. I cut my binding strips 2 1/2" x WOF (width of fabric).
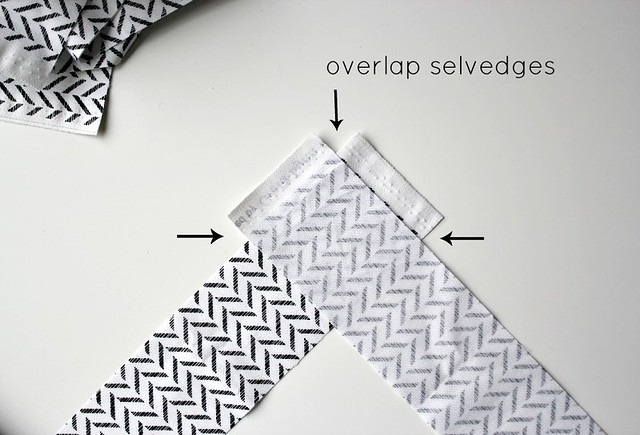
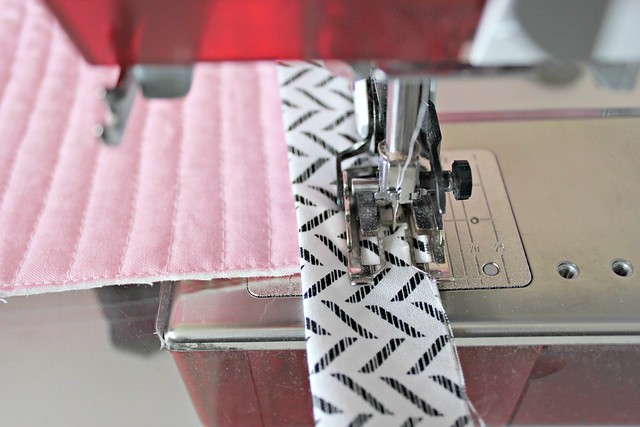
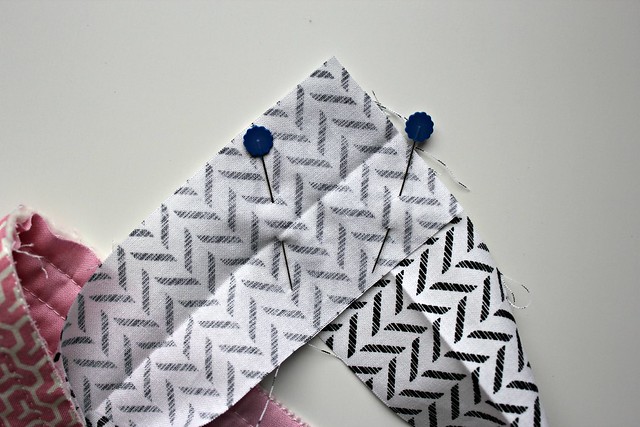
I like to join my binding strips at a 45 degree angle. I've found that it makes for a clean, crisp binding that appears almost seam-less. Start by placing two binding strips, right sides together, at a 90 degree angle. Overlap selvedges, this will help you see your corners better when sewing the strips together.
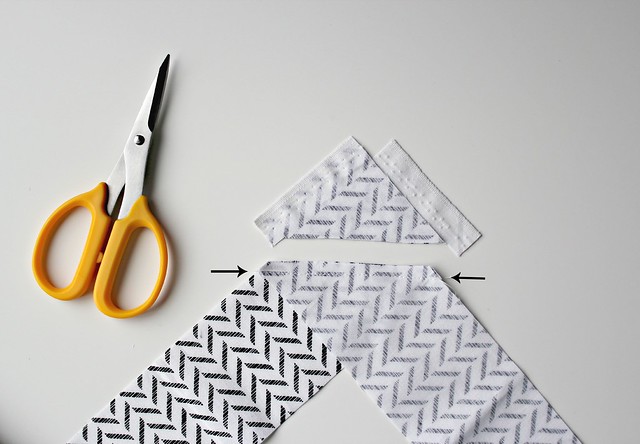
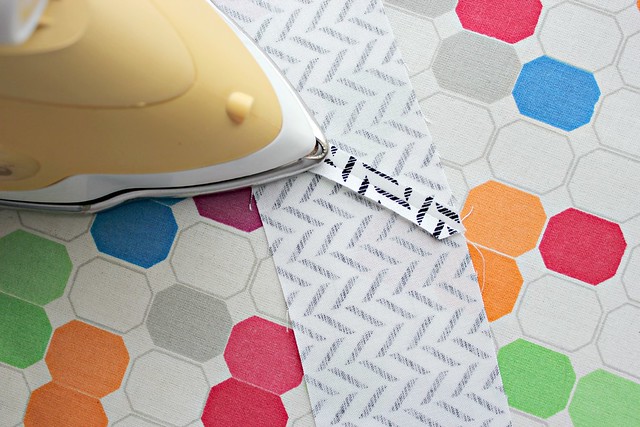
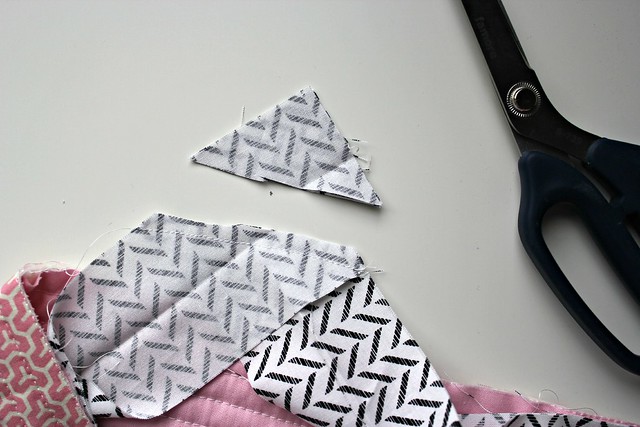
Using your basic sewing machine foot, stitch from corner to corner (see picture below). Trim corner & selvedges, leaving a 1/4" seam allowance. Repeat until you have one continuous binding strip.
Press seams open.
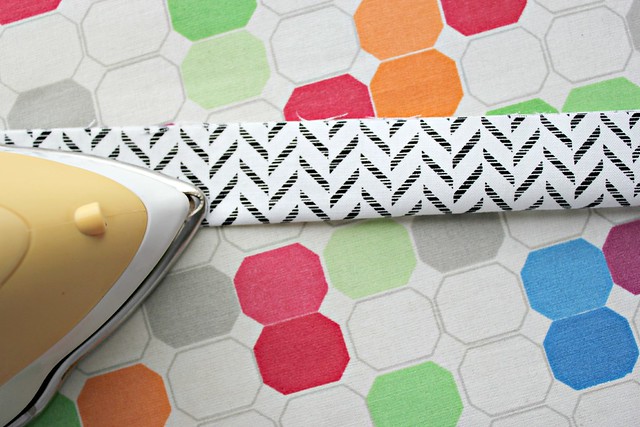
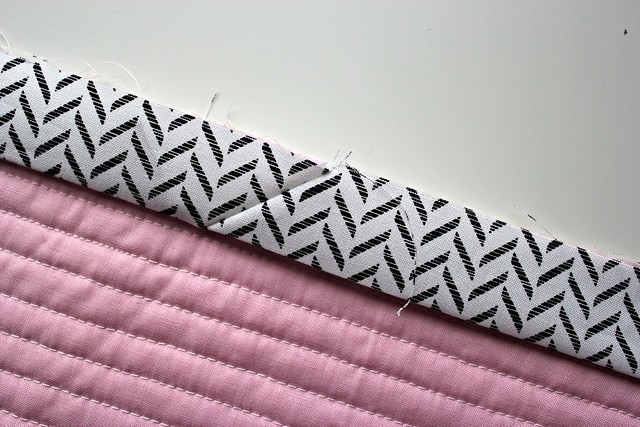
Press binding in half, wrong sides together.
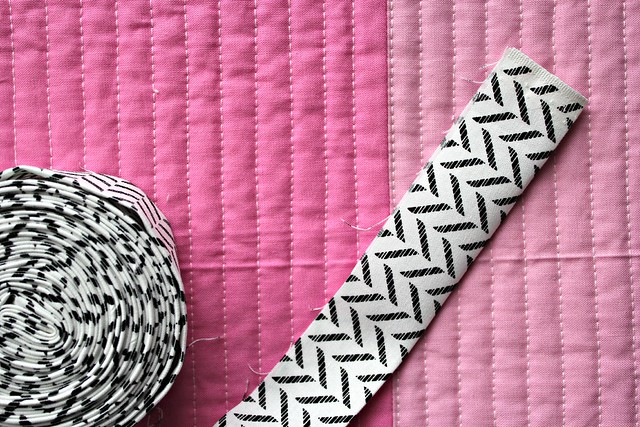
Now you're ready to attach it to the quilt.
:: ATTACHING THE BINDING TO THE QUILT ::
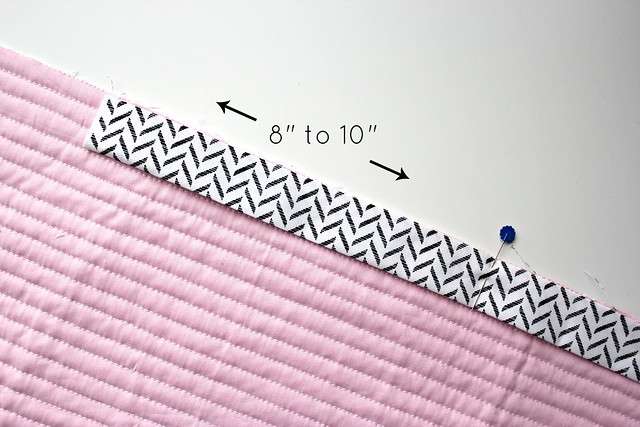
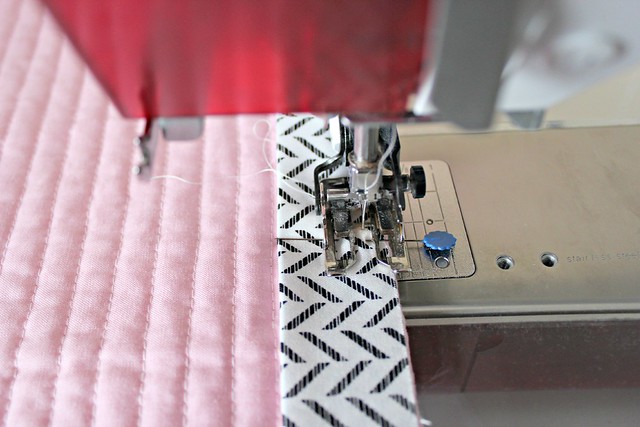
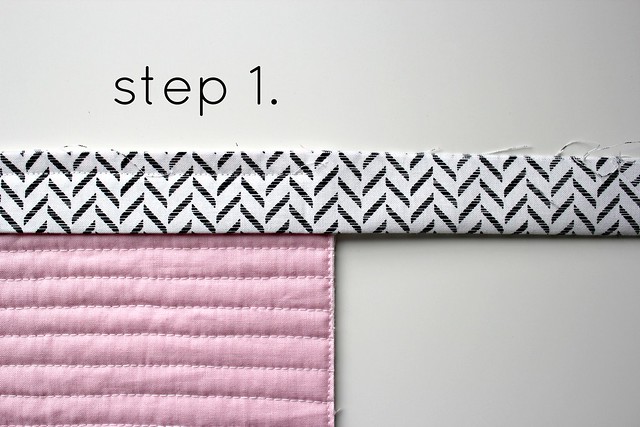
Start by laying your quilt out in front of you, right side up. Now place the binding along one edge. The folded edge should point towards the quilt, raw edges along the outside. Leave an 8" to 10" tail and place a pin -- this is where you are going to start sewing.
Using your walking foot and a 1/4" seam allowance, start sewing at the pin. Backstitch to secure your seam, and continue sewing along the straight edge of the quilt.
:: CORNERS ::
The next few steps are very important in order to keep the corners crisp & pretty.
Continue sewing until you are 1/4" away from the edge of the quilt. Backstitch.
Remove your quilt from the sewing machine and lay it out in front of you. The quilt should be on your left, the remaining binding to the right.
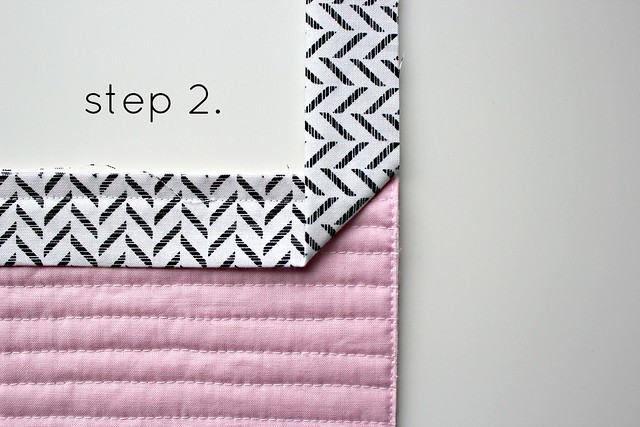
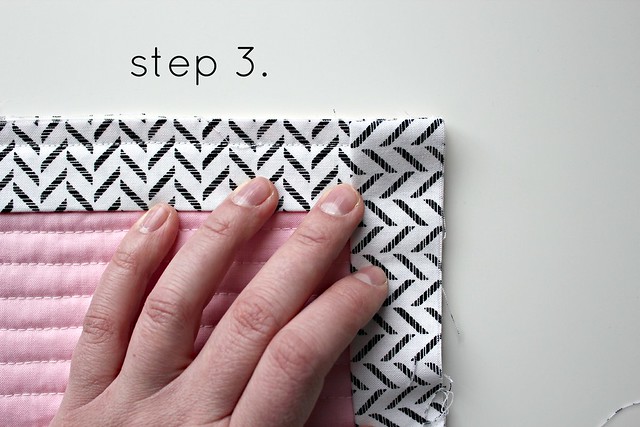
Take the binding strip and flip it up, creating a 45 degree angle. Finger press.
Now fold the binding strip straight down, onto itself. Make sure the folded top edge of the corner you just created is flush with the edge of the quilt. Finger press. Place a pin to hold the corner in place if necessary.
Using your walking foot & a 1/4" seam allowance, start sewing at the top of the corner. Backstitch. Continue sewing down the side of the quilt.
Repeat these steps to the remaining 3 corners.
:: JOINING YOUR BINDING ::
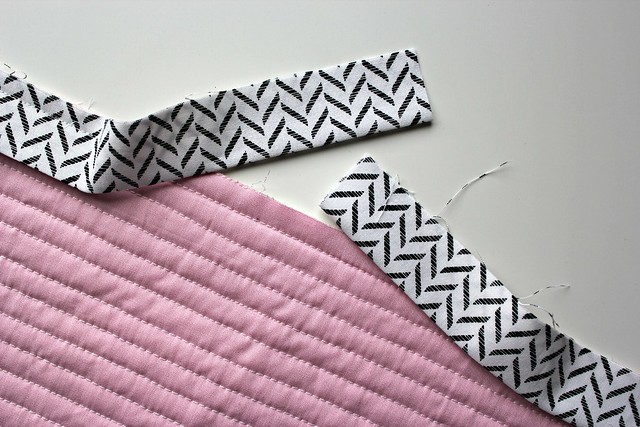
Now this step may or may not be a little different than what you are used to. I like to join my binding ends with a 45 degree angle, just like I joined the strips together.
Leave a 12" to 15" gap between the binding ends. Make sure to backstitch at both ends.
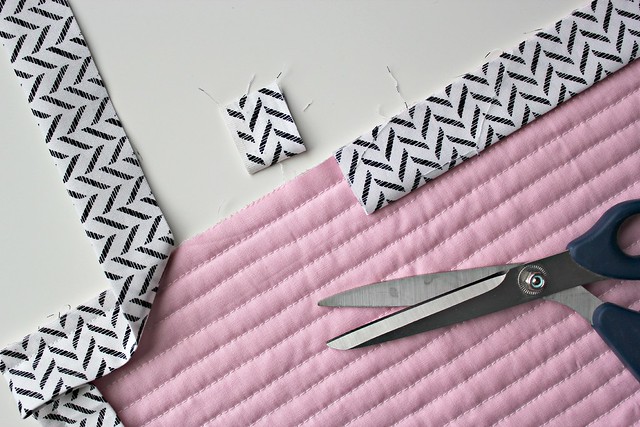
Lay the binding on the right down (the end you started with) and trip off a 1" piece of binding. Don't throw it away.
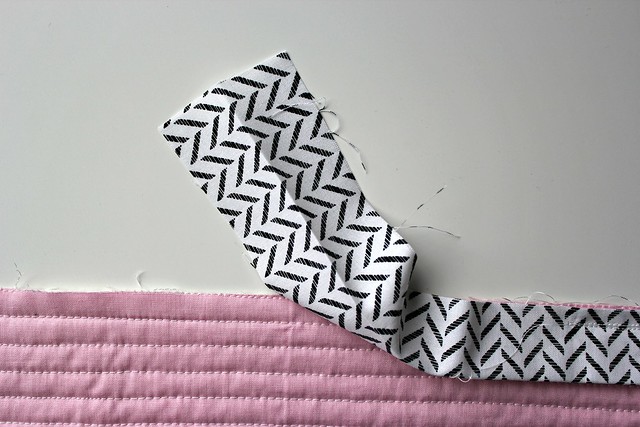
Now lay the binding on the left on top, the two strips should overlap.
Here's where that 1" piece of binding comes in handy. You now need to measure an overlap of 2 1/2" (the width of the binding strip). Rather than dig out my ruler, I use this 1" piece of binding (unfolded) to measure the overlap. Trim the top/left binding.
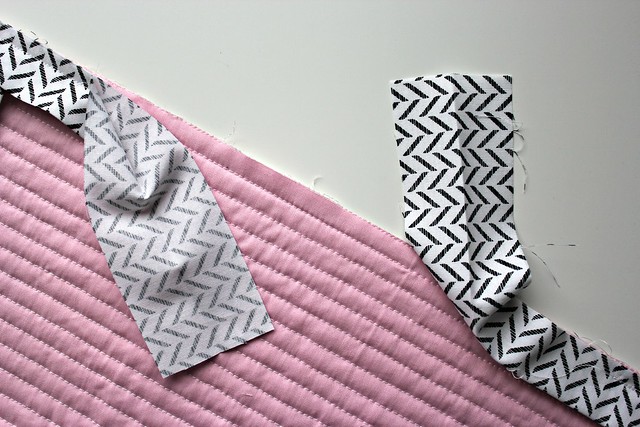
Your binding should now look like this.
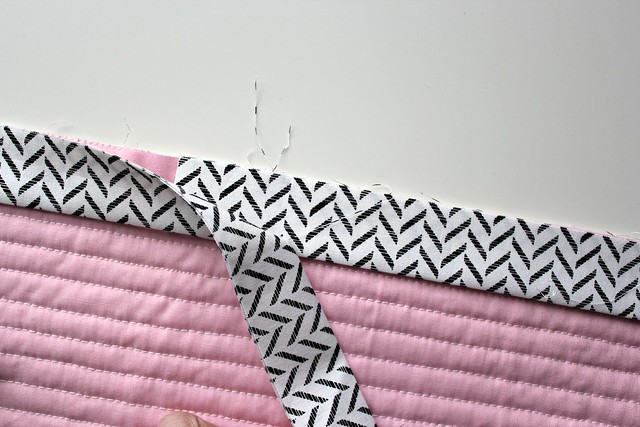
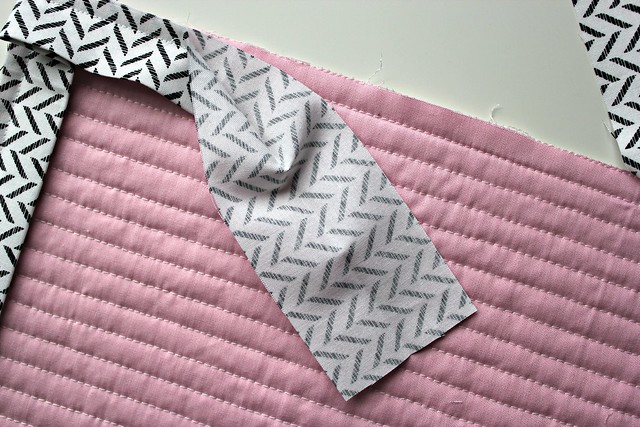
Take the binding on the right and place it unfolded, right side up.
Take the binding on the left and place it unfolded, right side down.
Together, the two strips should look like this.
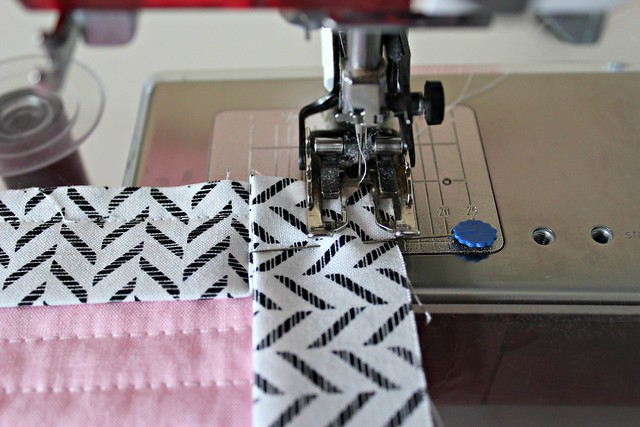
Careful not to twist the strips, place the binding of the left on top of the binding on the right at a 90 degree angle. Make sure the edges are flush (no overlap). Pin in place.
Using a regular sewing machine foot, stitch from corner to corner. Backstitch at both ends. Trim a 1/4" seam allowance.
Now lay your quilt flat and you shouldn't be able to tell where the two binding strips joined. Sew the remaining binding, using a 1/4" seam allowance and a walking foot.
Ready to hand stitch? Check out part two, Double Fold Binding :: Hand Stitch Tutorial.
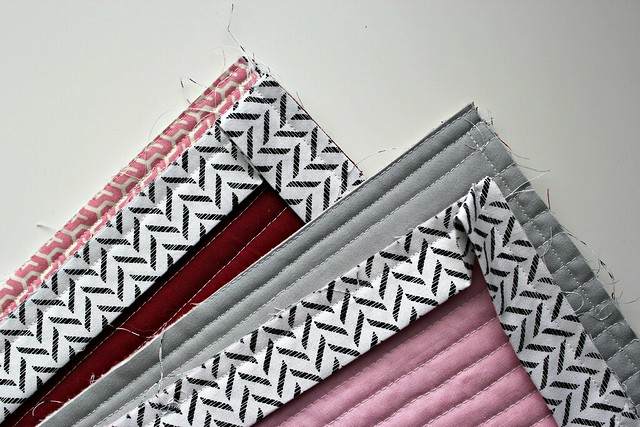
Love the straight-line quilting in this post? Then check out my tips & tricks post!


Beatiful!!!!!
ReplyDeletethanks you.
hugs
Maria Filomena
Portugal
This is my favorite method of binding too. There's something really wonderful about snuggling under a nearly finished quilt while handstitching the binding :)
ReplyDeleteThis is how I o it too - but I love the inclusion of using the clipped off end to measure the overlap! Thanks for the tip!
ReplyDeleteGreat tutorial! I'm a veteran of binding using this method but I ALWAYS struggle when it comes to attaching the ends together. With my next quilt I'm going to use your instructions and I'm sure it will be a breeze for me. Thanks!
ReplyDeletePerfect!
ReplyDeleteLove this. Especially the way you attach the two ends!
ReplyDeleteThank You!! I recently tried this for the first time with a different tutorial and it went horribly wrong. I couldn't figure out what I'd done wrong, but your tutorial is beautifully clear and I think I have it now :) YAY!
ReplyDeleteSnipping the binding piece ! Thank you for that the simple trick : )
ReplyDeleteThis may be the best binding tutorial I've ever seen!!! I have the worst time joining the beginning and end pieces and will definitely reference this the next time I bind; thank you!
ReplyDeleteAwesome! I always mess up my corners somehow. Next quilt I'm following directions exactly!
ReplyDeleteGreat tutorial - thanks.
ReplyDeleteYou just provided the best explanation I have ever found for how to properly join the end tails of the binding! Genius, thank you for sharing!
ReplyDeleteMy most hated part of binding is sewing the two pieces together. Your method looks pretty easy. I'll try it. Thanks!
ReplyDeleteSnipping the one inch piece of binding is brilliant! Love your idea. Thank you.
ReplyDeletegreat tutorial, I'm going to try later on in the day! I love the last part of the tut, I always tucked one end in the other but that gives a bulky finish.
ReplyDeleteI just tried it and it worked out sooooooooooooooo smooth :-)
ReplyDeleteThis is the best and easiest step by step tutorial for joining the two ends!! Thank you!! I am going to test it out this weekend. I hope that you don't mind if I Pin your tutorial for reference!! Thank you!!!! ;-)
ReplyDeleteGreat Tute! Thank you!
ReplyDeleteWonderful tutorial for binding. Great visuals too! It's very similar to my method of joining the ends. I also fold the end of the left binding strip at a 45 degree angle and finger press to get a crease which acts as my stitching line. Thanks for sharing this!
ReplyDeleteOh thank you for the time you've put into this! I was trying to find a good binding tutorial a while ago for a friend, and there's a few out there but the photos are atrocious! Your clear, bright photos are wonderful, thank you!
ReplyDeleteWow, this is so much better than the technique I've been using. Thank you!
ReplyDeleteHi Megan,
ReplyDeleteI LOVE your tutorials. They are one of the best I've even seen so far. The pictures are amazingly crystal sharp. Thanks so much! Perfect binding :)
thank you!!! your photos of the joining are so clear!!
ReplyDeleteThank you so much for the easy to understand tute! I have tried figuring this method out from others and what a disaster! No more bumps in my bindings!
ReplyDeleteThis is the best binding tutorial ever! I have struggled with binding and everytime I forget what I am doing. I love this it is so simple!
ReplyDeleteUnbelievable!!! I am bookmarking your blog for sure. This is absolutely the best binding tutorial I have ever seen. Binding has always been my least favorite thing about quilting. As I read your tut the light bulbs went off in my head and I said "you have got to be kidding". I totally "got it", thanks to you and the straight forward way you spelled it out. The pictures you took are amazing too. Thank you so so much.
ReplyDeleteYou've nailed it!! I'm directionally challenged and struggle with the final diagonal joining of the binding. It can take me hours to get it right!! I'm so inspired that I'm going to sew a binding that I've been putting off for months! Thanks so much for these clear beautifully photographed instructions.
ReplyDeleteYou've nailed it!! I'm directionally challenged and struggle with the final diagonal joining of the binding. It can take me hours to get it right!! I'm so inspired that I'm going to sew a binding that I've been putting off for months! Thanks so much for these clear beautifully photographed instructions.
ReplyDeleteGenial!!!. Thanks!. :-O
ReplyDeleteAdorei, aprendi uma nova técnica, eu fazia de forma diferente. Obrigada.
ReplyDeleteWow great tutorial.Thanks to post here.
ReplyDeleteCNC Routers
Great Tutorial, you've laid it out perfectly and it's so easy to understand. Binding is definitely my least favorite thing to do on a quilt, but I get it done, because I then have a gorgeous work of art ready for a gift or my bed, wall, or wherever it's going to go. This to is always how I've done binding, because while machine binding both sides seams ok, it's just not something I would do on an heirloom. Placemat, yes, quilt.. no :)
ReplyDeleteI just used your tutorial --- first time EVER that I've not had to go back and resew the last join. Thank you!
ReplyDeleteI have a baby quilt that just needs binding, so this tutorial is very timely for me. I've bookmarked it for easy reference. Thank you.
ReplyDeleteYou have just become my new hero!!!! No, SUPER-hero!!! I have had problems with excess fabric in my binding for ages and have been so frustrated. First go at your tutorial and BOOM!! Perfection! It was so simple.
ReplyDeleteBest binding tutorial I have seen! GREAT JOB!
ReplyDeleteBest binding tutorial I have seen! GREAT JOB!
ReplyDeleteI just read your binding tutorial.After reading a zillion tutorials and using the binding tool, I think I've got it. And, no need for "the binding tool" anymore... many thanks.
ReplyDeleteJ Martin
This is the best binding pictorial representation I've seen yet! Love your 1" trim trick!
ReplyDelete
ReplyDeletethank you!!!!!
Excellent tutorial. ! Thank you!
ReplyDeleteExactly how I do the binding too!
ReplyDeleteThank you. The last step always got me!
ReplyDeleteExcellent...I always use this method to bind quilts.
ReplyDeleteAwesome tutorial!! I'm so glad you did this with a binding that has a definite right and wrong side. Makes it so much easier to follow. And I can understand this on the pictures alone! One question though. Does that trick with the one inch piece that gets snipped off work the same way no matter what width binding is used? Sometimes I like to use 2.25" strips.
ReplyDeleteAbsolutely the best binding tutorial I have seen...your work is excellent and perfect.
ReplyDeleteExcellent explanation of something I never understood well! Many thanks!
ReplyDeleteI'm new to quilting and this changed my life for the easier. I can't thank you enough!
ReplyDeleteGreat instructions!
ReplyDeleteFabulous tutorial! That last bit about the diagonal join is their only new party, but it's a game changer for sure. Thank you for sharing!!
ReplyDeleteI have this tutorial bookmarked so that I can find it easily when binding time rolls around.. Thank you.
ReplyDeleteThis tutorial makes my binding perfect every time. Thank you.
ReplyDeleteThis tutorial is perfect! I tried to follow another tutorial over on craftsy and it was nowhere near as detailed as yours. Subsequently, I messed up the binding during my first attempt but with your instructions, I actually understand how to make a continuous loop! Thanks so much!
ReplyDeleteThis binding tutorial is fantastic--such clear steps and photos--and so complete. I have always struggled with binding. I used your tutorial last night and it worked like a charm. So thanks so much! Also, I hand sew to the back the same way you do--I love hiding the stitches in the fold. : )
ReplyDeleteLove this method of binding although that's a great tip with the 1" piece of binding to rejoin at the finish/start! Thank you for the tip!
ReplyDelete