


Hello everyone, my name is Megan and I blog right here at Canoe Ridge Creations! Welcome to my stop on the New York Beauty QAL! Today we will be focusing on Block 1. You can find all of the templates featured in the QAL right here! If you are sewing along with us -- or want some inspiration -- be sure and join the flickr group! Let's get started!
Getting Started.
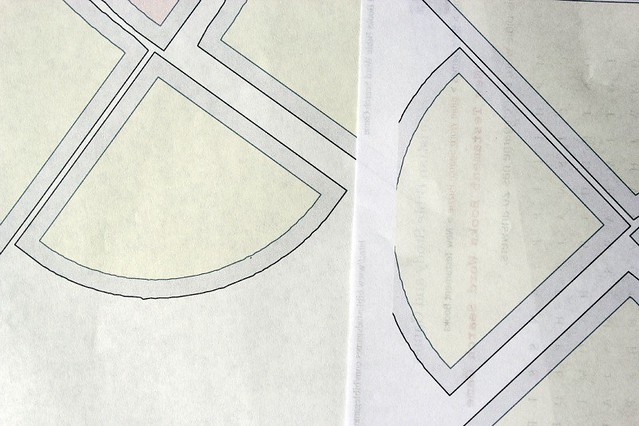
Before we get sewing, you will need to print off the paper piecing template for Block 1. Now, I had some trouble printing my template onto normal printing paper (8.5" x 11") -- it kept cutting the corner+edge off of my templates. You could certainly draw in the missing edge with a pencil, but I used some legal paper (8.5" x 14") I had sitting around and it worked out perfectly!
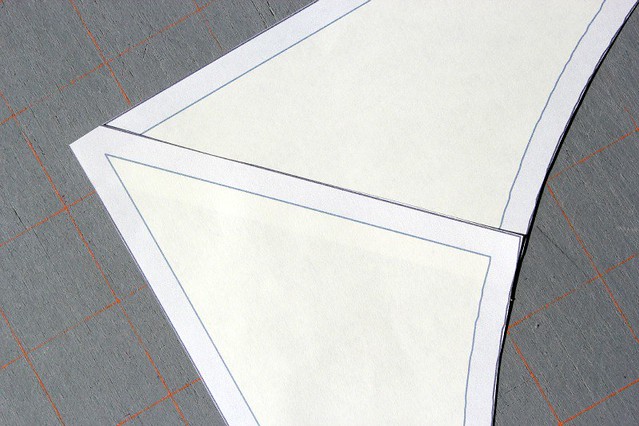
You will notice that the block template has you cut out two different pieces for the outside arch, having a seam down the center in your final block. For my block I didn't want to see that diagonal seam, so I taped the two template pieces together (overlapping at the seam allowance).
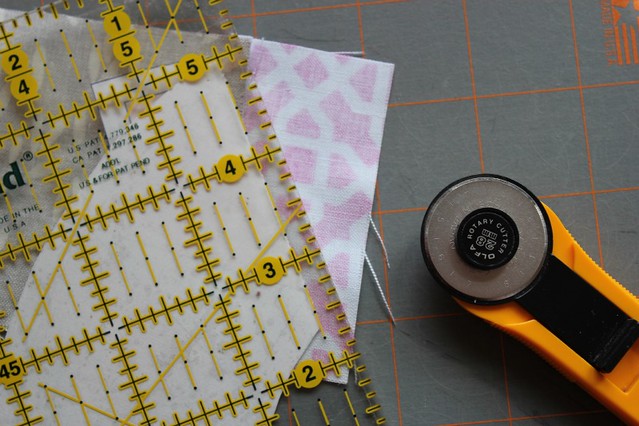
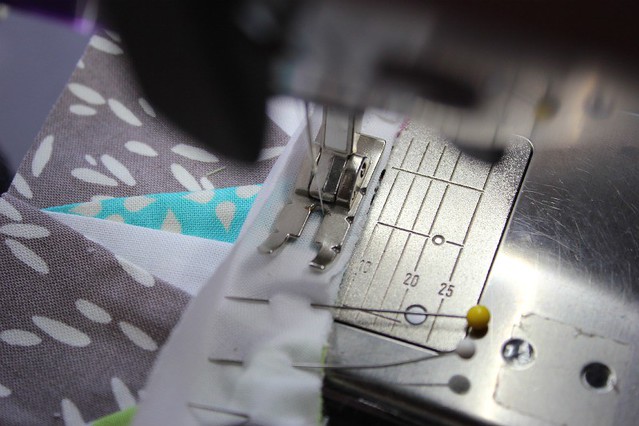
I recommend starting this project (and every new sewing project) with a new needle -- I use Schmetz Universal -- Size 12/80 . Also, be sure to shorten your stitch length (around 2mm), as it will make things easier when tearing the paper off your finished block.
Materials Needed.
-- block 1 template, printed and cut out.
-- twelve 2 1/2" x 3" pieces (background of pieced arches)
-- four 1 3/4" x 3" pieces (points on inner pieced arch)
-- six 1 1/2" x 3" pieces (points on outer pieced arch)
-- six 1 1/2" x 3" pieces (contrast points on outer pieced arch)
-- 9" x 9" square (for block background)
Block Construction.
Inner Pieced Arch.
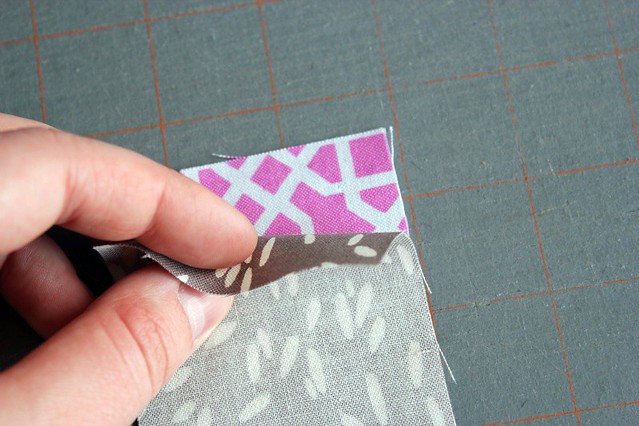
1. With right sides together, place one background arch piece (gray) on top of a inner arch point (pink).Materials Needed.
-- block 1 template, printed and cut out.
-- twelve 2 1/2" x 3" pieces (background of pieced arches)
-- four 1 3/4" x 3" pieces (points on inner pieced arch)
-- six 1 1/2" x 3" pieces (points on outer pieced arch)
-- six 1 1/2" x 3" pieces (contrast points on outer pieced arch)
-- 9" x 9" square (for block background)
Block Construction.
Inner Pieced Arch.
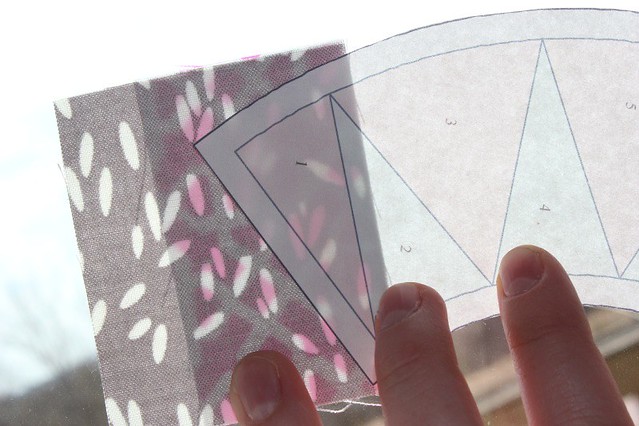
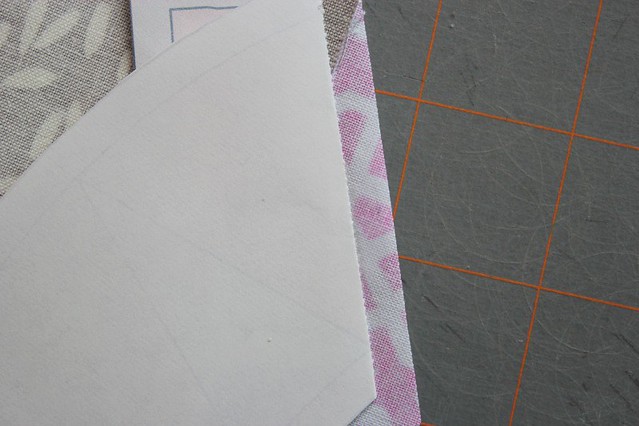
2. Lay the inner arch template piece on top of the fabric unit. Making sure to overlap stitch line 1 by 1/4".
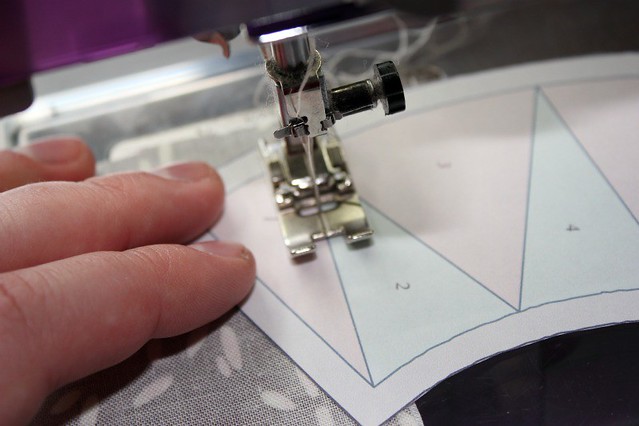
3. Sew along stitch line 1.
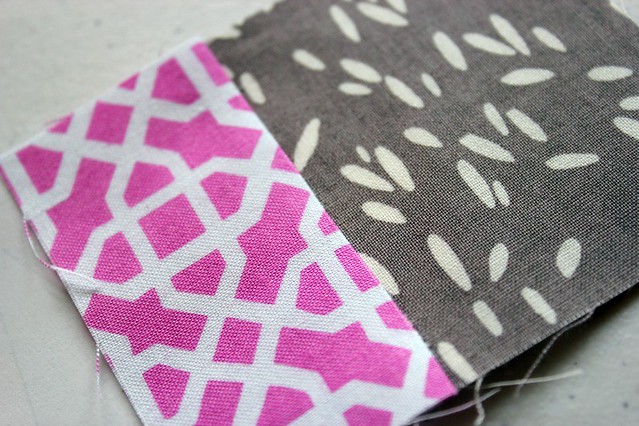
4. Press seam.

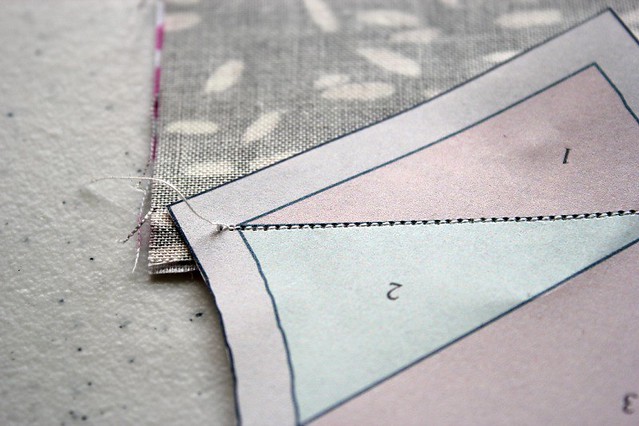
5. With right sides together, add the next background arch piece. Making sure to overlap stitch line 2 by 1/4".
6. Sew stitch line 2.
7. Fold back the paper template along the stitch line.
8. Trim the seam to 1/4".
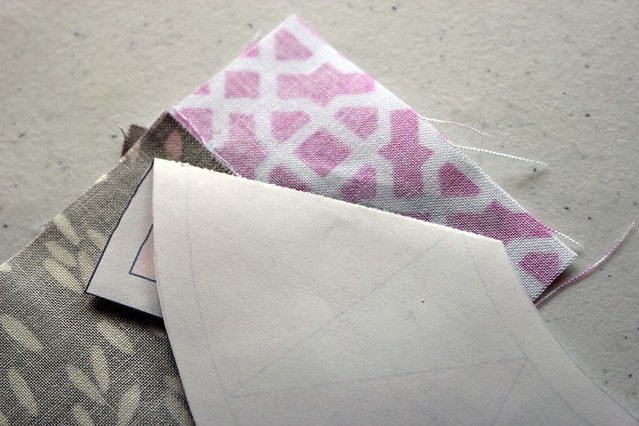
9. Continue this process until you've reached the end of your inner pieced arch unit.
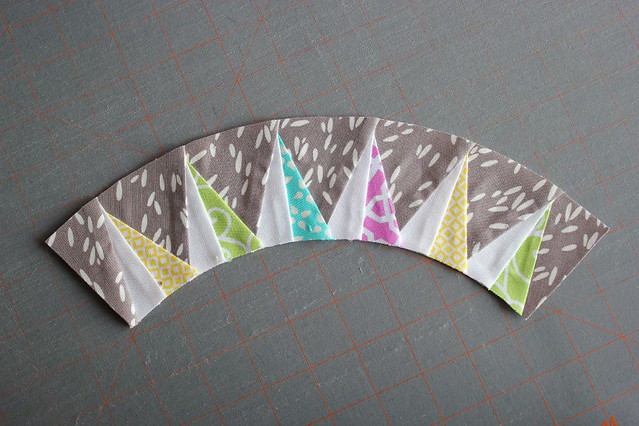
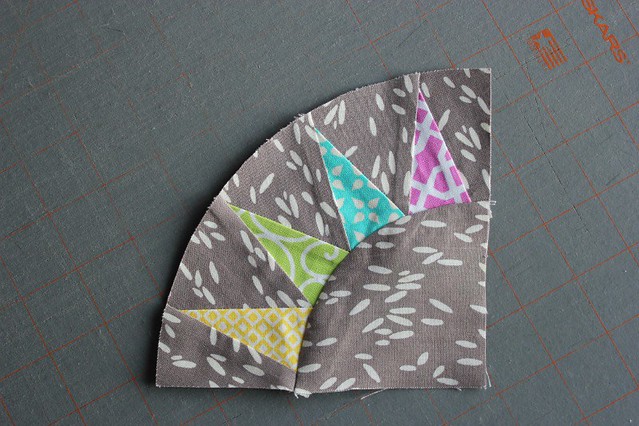
10. Using the paper template as a guide, cut out your finished inner pieced arch.
Outer Pieced Arch.
1. Repeat the same process with your outer pieced arch.
Assembling the Block.
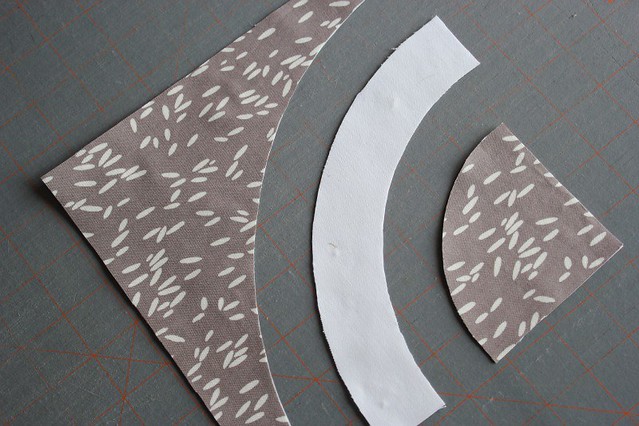
1. Using the paper templates as a guide, cut out the background fabric pieces.
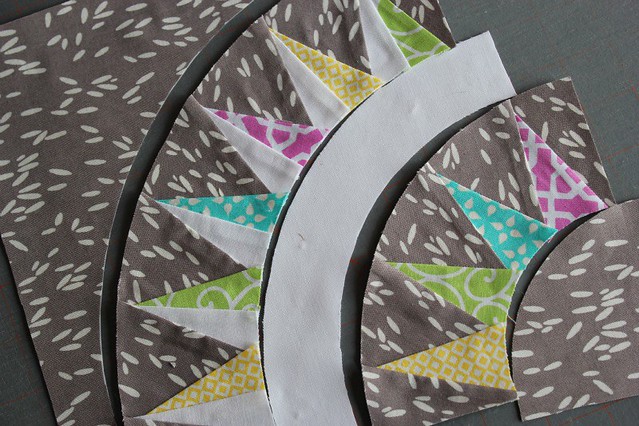
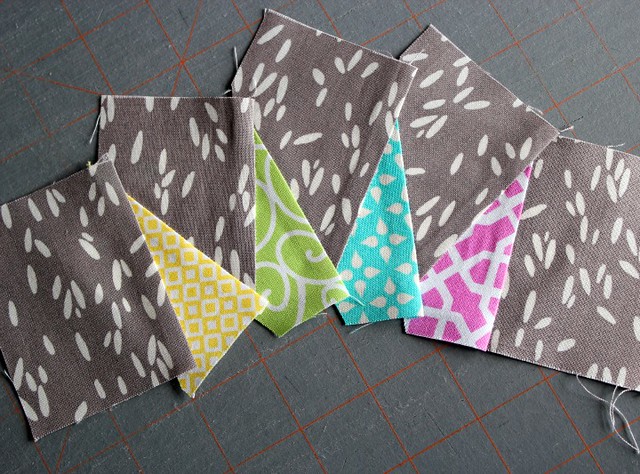
2. Layout your block.
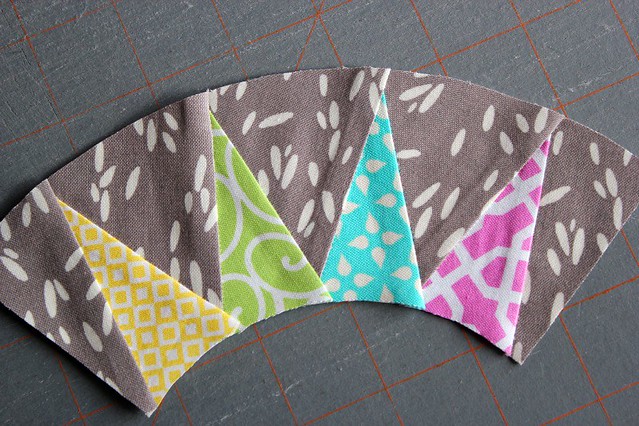
3. Working from the inner arch to the outer block, sew your arches together. At this point, my paper pieced arches still have the paper attached while the background pieces do not.
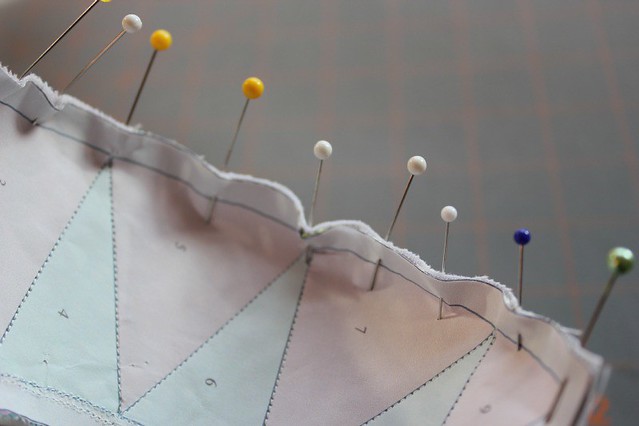
4. Be sure to pin, pin, pin those curves.
5. Sew the pieces together using a 1/4" seam allowance.
6. Be sure to gently press the seams after each new arch is sewn on.
remove paper pieced template and done!
Thanks for stopping by Canoe Ridge Creations and I can't wait to see your New York Beauty blocks! Oh, and feel free to link up any finished blocks to {Sew} Modern Monday.
xo, megan.


Wow, that is amazing. I can't wait until I'm a more advance quilter. I'm still in the beginner stage. This looks so great!
ReplyDeleteWow looks awesome!!! Will bookmark this for when I get a little further with paper piecing =D
ReplyDeleteI'm holding a small swap over at my blog if anyone is interested please pop over for a look =D
http://ibescheraldine.blogspot.co.uk/2012/03/anyone-want-to-swap.html
It looks fabulous! I love the Echo print you've used for your background.
ReplyDeleteThanks... I finished my first two last night!
ReplyDeleteYay, glad to see I'm not the only one that leaves the paper on! Love the fabric combo too :o)
ReplyDeleteYour block is beautiful!! I am so glad to see you using the size 80/12 needle. Tbe previous tutorials (and my books) suggested a 90/14, but I think I am more precise with the smaller needle. I learned to sew my arches with the paper on when I first learned to paper piece. I may try it again on this block.
ReplyDeleteThis is a super tutorial, thanks for sharing!
ReplyDeleteI don't know if other's have it, but my Adobe print options has a function "Print Current View" so I print the two pages and then if anything is cut off from the bottom I scroll so the bottom of the page is right at the bottom of the screen and choose that option. On really long pieces some taping/gluing may need to be done, but on this one it worked well for the bottom piece on the second page. Just if someone doesn't have legal paper!
ReplyDeleteHi there... I am way behind in this stitchalong but I did 2 of these blocks today... thanks so much for your tutorial... helped a lot...
ReplyDeleteHugz
Sorry I cant find the pattern please where is it?
ReplyDeletethanks ♥
My mail is gracielarte@gmail.com
ReplyDeletethanks ♥
The tutorial is great
ReplyDeletethanks a lot ♥♥♥ again
I just happened upon this BOM and love New York Beauty...I tried to download your template but receive an error. Is there anyway I could get a copy? Thank you.
ReplyDelete