
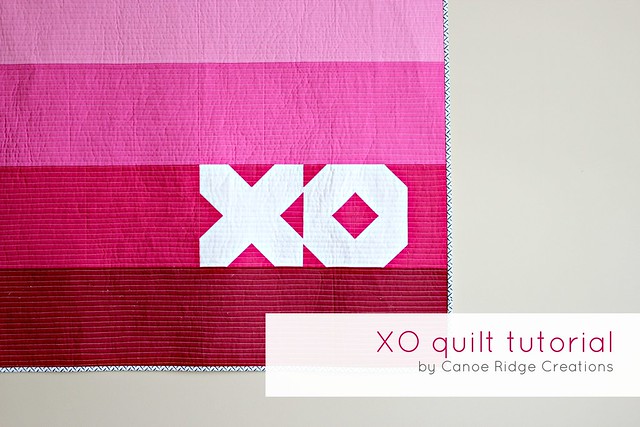
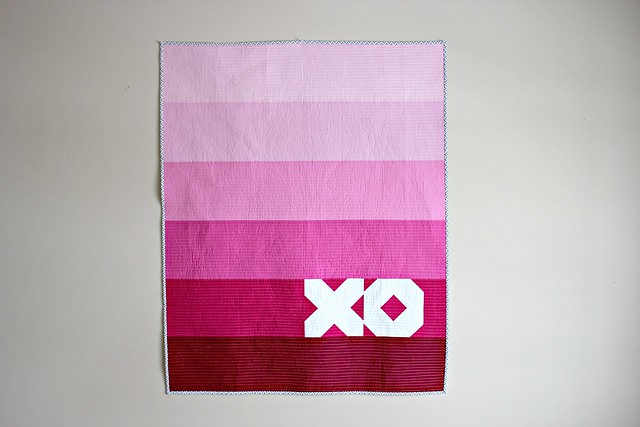
Today I'm sharing a quick + easy quilt tutorial just in time for Valentines Day. Finishing at 42" x 52", it would make a great baby quilt too! All you need is a little fabric, your sewing machine, and you could have the quilt top complete in one afternoon -- yay! Let's get started.
:: FABRIC REQUIREMENTS ::
Fabric A (Kona Medium Pink) - 1/3 yard
Fabric B (Kona Carnation) - 1/3 yard
Fabric C (Kona Candy Pink) - 1/3 yard
Fabric D (Kona Bright Pink) - 1/3 yard
Fabric E (Kona Pomegranate) -1/3 yard
Fabric F (Kona Wine) - 1/3 yard
White Fabric - 1 fat quarter
Binding - 1/2 yard
:: CUTTING ::
Fabric A - one strip, 9 1/2" x 42"
Fabric B - one strip, 9 1/2" x 42"
Fabric C - one strip, 9 1/2" x 42"
Fabric D - one strip, 9 1/2" x 42"
Fabric E - one strip, 9 1/2" x 21 1/4"; one strip, 9 1/2" x 3 1/4"; and sixteen squares, 2 1/2" x 2 1/2"
Fabric F - one strip, 9 1/2" x 42"
White Fabric - eight squares, 5" x 5"
:: MAKING THE BLOCK UNITS ::

Draw a diagonal line, from corner to corner, on the wrong side of one 2 1/2" square (Fabric E). Layer one 5" white square and one marked 2 1/2" square (Fabric E), right sides together, with the 2 1/2" square (Fabric E) in the upper right corner. Sew on the marked line. Trim the corner, leaving a 1/4" seam allowance.
Press seam outward.

Draw a diagonal line, from corner to corner, on the wrong side of one 2 1/2" square (Fabric E). Layer one 5" white square and one marked 2 1/2" square (Fabric E), right sides together, with the 2 1/2" square (Fabric E) in the lower left corner. Sew on the marked line. Trim the corner, leaving a 1/4" seam allowance. Press seam outward.

Repeat to make a total of 8 block units.

:: MAKING THE "O" BLOCK ::

Take 4 block units and arrange them in an "O", see diagram above. Pin and sew using a 1/4" seam allowance, first into rows then into one block. Press seams open.
:: SEWING THE QUILT TOP ::

Using the diagram above, layout the quilt top. Pin and sew using a 1/4" seam allowance, press open.
:: QUILTING ::

I choose to use 1/2" straight-line quilting to finish my XO Quilt using Aurifil 50 wt. (2021).
:: BINDING ::
Check out these two posts for helpful information & step-by-step instructions:
Double Fold Binding Tutorial | Part One
Double Fold Binding Tutorial | Part Two
XO Quilt
Finished Size: 42" x 54"
If you make this quilt using my tutorial please share in the Canoe Ridge Creations Flickr group -- I love seeing your creations!
xo,
Megan.


Love this!
ReplyDeleteI love this quilt! thank you for the tut.
ReplyDeleteAwesome quilt, thank you for the tute!! Pinning :)
ReplyDeletesimple but awesome!!! I've pinned it for future inspirations :-)
ReplyDeleteWhat a gorgeously simple idea! I love it!!
ReplyDeleteAdorable Megan! Thanks for the tutorial..I would love to do this for my next baby girl quilt!
ReplyDeleteI agree with Mary, it would make a perfect baby girl quilt! And all the pinks are so pretty!
ReplyDeleteVery very cute! I love the simplicity of it!
ReplyDeleteI love this!
ReplyDeleteThank you!
Sometimes love is so easy...this is fabulous!
ReplyDeleteSo sweet, so simple, so AWESOME!!
ReplyDeleteFabulous quilt!
ReplyDeleteThat's Beautiful! I'm new here, so maybe you've talked about this before but, what kind of thread do you use for your quilting? Mine never look that pretty.
ReplyDeleteAwesome! Thanks for putting this together!
ReplyDeleteSo cute!
ReplyDeleteThank you so much for this. I am going to make this for our elder granddaughter (10) and then she can snuggle up in it and say I am still giving her a kiss and a hug forever. Think I'll make my grandson (13) one too so he can say the same.
ReplyDeleteLove this! tao of badass
ReplyDeleteYour article is extremely impressive.
ReplyDeletegoogle sniper
Loving this!
ReplyDeleteThank you very much, had fun making this one.
ReplyDeleteKind regards from Holland,
Marga♥
Did one but did pay any attention on whether the author has to agree or not.
ReplyDeleteSo try again.
Thank you, had a lot of fun making this one.
Kind regards from Holland,
Marga♥
Omgosh! Your the one I got this quilt pattern from! 😂 I will have to put your name in my Instagram post! I made this adorable quilt 2 years ago. Just this last year had it quilted. I just want to say thank you sooo very much for such a cute pattern!
ReplyDelete